In our today’s article guide, we shall educate you more about How To Screen Record On Windows With Audio in 2023.
Many times, people want to record the screen on their computer, but they don’t know how to record the screen in Windows system. How to screen record with audio on Windows? Don’t worry, the editor has collected a lot of information and prepared two methods for recording computer screen video.
For various purposes we need to record computer screen to make videos. For example, we can use the screen recording function to conduct distance learning lectures or record online meetings, capture wonderful game moments and share them with others, record streaming videos for permanent viewing, make tutorial videos, etc. No matter what the reason is, after reading this article, you can easily use the two methods introduced in this article to screen record on Windows with audio.
Method 1: Use Xbox Game Bar Screen Record on Windows with Audio
This is a screen recording software that comes with Windows system. You can use it for free to record various screens on your computer, except for the desktop and file explorer, which cannot be recorded. The following are the specific steps on how to screen record on Windows with audio using Xbox Game Bar.
Step 1. Click the Start button and gear icon at the bottom to open Settings.
Step 2. Select a game. After the Xbox Game Bar part opens, confirm that the Xbox Game Bar function is turned on. If it says off, click the toggle switch and turn on the Xbox Game Bar function. Then you can record your Windows screen.
Step 3. Since the Xbox Game Bar cannot record the desktop and file explorer, remember to open the application you want to record before starting to press the shortcut keys to open the Xbox Game Bar. Press the Win+G keys to open the Windows pre-installed screen recorder.
Step 4. Click the Start Recording button (or press Windows Key + Alt + R) to record your screen in Windows 10. You can click the Settings button and change the default settings, such as choosing whether to record audio.
Step 5. In the upper right corner of your computer screen, you can see “Capture Status” which shows the recording time. To end the recording, just click the green button.
To view your recorded video, press Windows Key + G and open the tool. Click on the widget menu, select Gallery, and you can watch all the videos you have recorded. These videos are saved as MP4 files. Another way to find recorded videos in Windows is to go to the captures subfolder under the Videos folder.
Method 2: Use Joyoshare VidiKit Screen Record on Windows with Audio
When Xbox Game Bar doesn’t meet your needs, Joyoshare VidiKit is our preferred screen recorder with audio. This is a simple and powerful one-stop video toolkit that is not only suitable for various versions of Windows systems, but also Mac version. Joyoshare VidiKit can capture every activity on the Windows screen, including desktop and file explorer which Xbox Game Bar cannot record, and it suppots to record webcam as well.
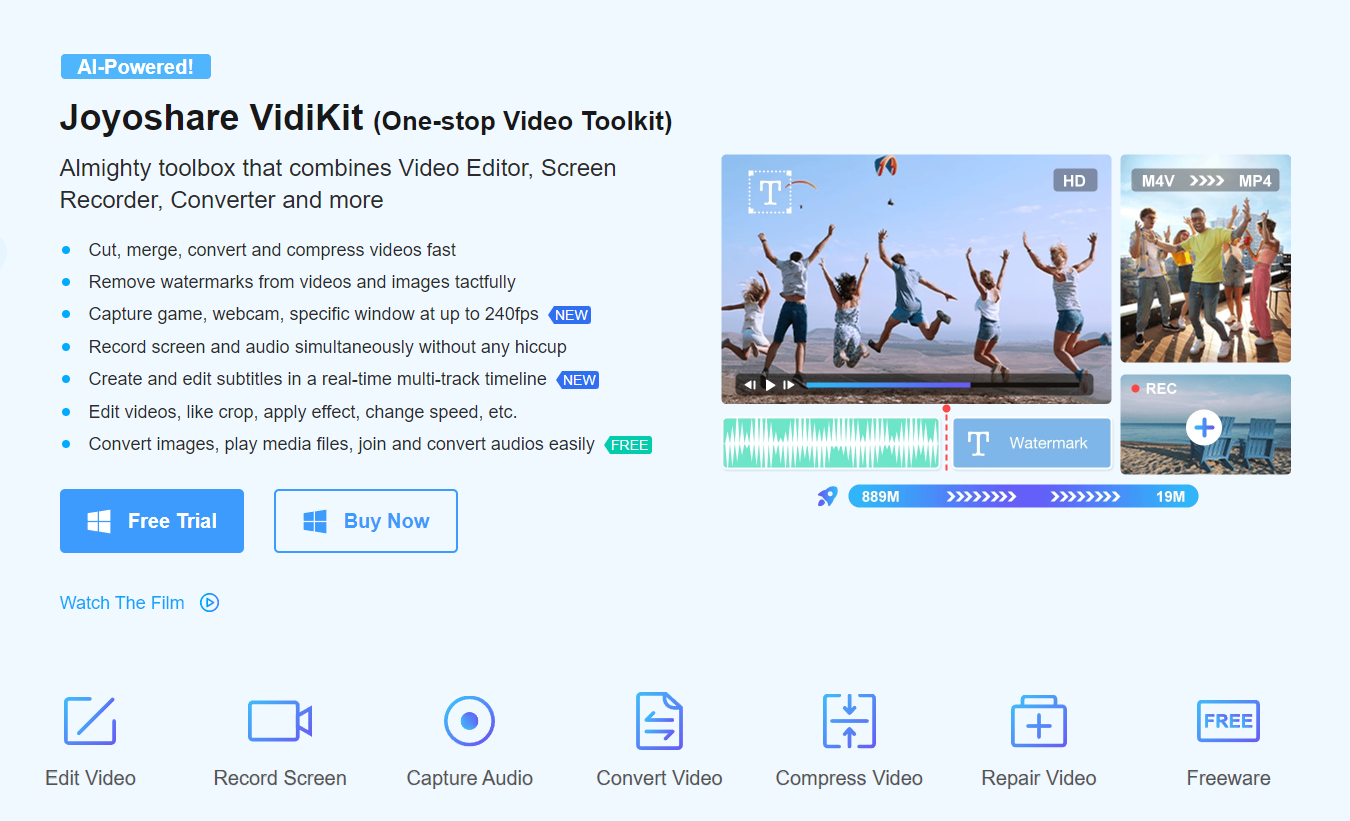
Joyoshare VidiKit can help you record part of the computer screen, full screen, and flexibly select any area, capture games, webcams, specific windows at up to 240 fps, and easily record meetings, streaming videos, gameplay, and video tutorials.
As we said before, Joyoshare VidiKit is a one-stop video toolkit, which not only helps us screen record, but also helps us quickly cut, merge, convert and compress videos; remove watermarks from videos and images; edit videos , such as cropping, applying effects, changing speed, editing subtitles, etc.; easily convert images, videos, audios.
How to screen record on Windows with audio using Joyoshare VidiKit? It is very easy to do. Check the following steps.
Step 1. Free download and install Joyoshare VidiKit on Windows. Once completed, open it. Select Screen Recorder in the Record section of the main interface of Joyoshare VidiKit, and select Record video and audio mode by default.

Step 2. In the main interface of Screen Recorder that opens, click the capture area button, from which you can adjust the screen area you want to record. The software also provides some ratio options, such as 1280×720, full screen, etc.
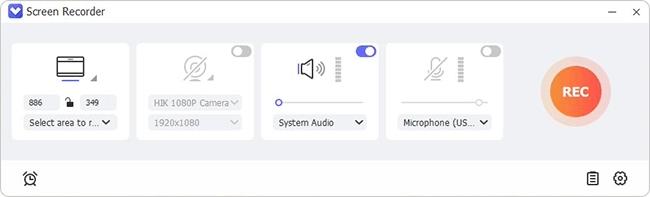
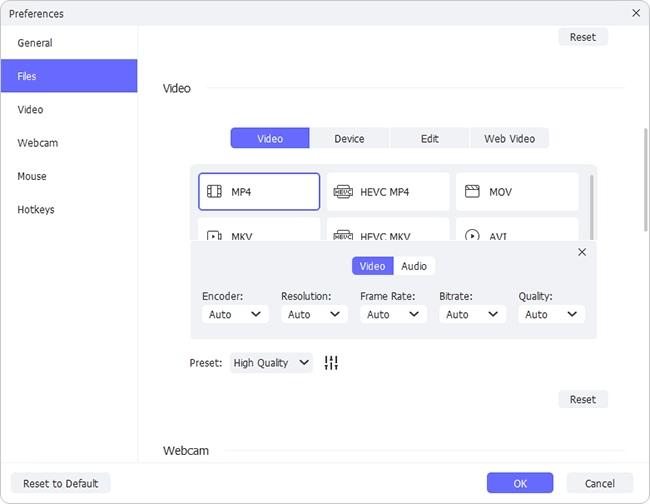
Step 3. To record screen video with audio, you just need to click the relevant icon to turn on the microphone and system audio according to your actual needs. You can also adjust the volume and specify the audio cable to capture the sound. Then click the gear icon button to further customize the screen recording according to your actual needs. You can change the output format, embed watermarks, etc.
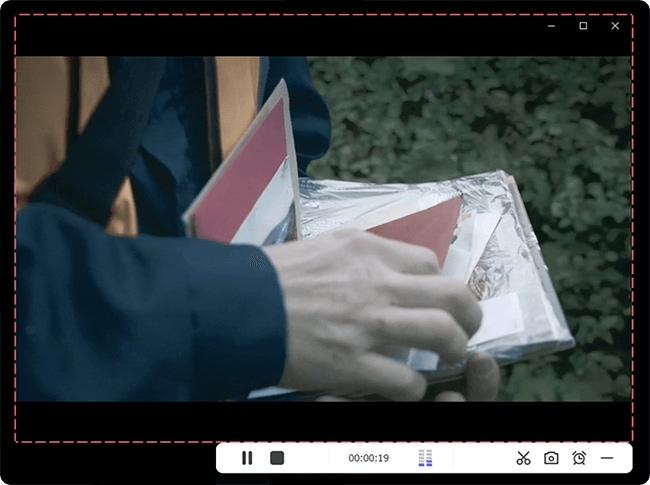
Step 4. After selecting everything, click the REC button to start capturing screen and audio. During recording, you can take screenshots, cut the video and pause to skip any unnecessary content. Click the “Stop” option in the toolbar to complete the recording. Then you can see the completed video in the pop-up history window. You can also rename or simply edit your recorded videos according to your needs.
Thanks for reading this useful post about How To Screen Record On Windows With Audio from ICT Catalogue.