Graphics Processing Unit (GPU) in the computer requires maintenance. I will teach you how to apply thermal paste to GPU which is also a key maintenance procedure for your graphics card.
I have written quite a few articles about GPUs lately which include one about the Nvidia graphics card and another about the AMD Radeon graphics card. Today, I am writing a completely different article that will cover all graphic cards.
The graphics card in the computer is also another processing unit that generates more heat when functioning. For that reason, it has both a heatsink and a cooling fan. Most GPUs even have two of these fans.
Lying between the heatsink and the GPU head is what is called the thermal paste. As the name suggests, it is a paste between the GPU and the heatsink which helps with heat transfer from the chip to the heatsink.
Why thermal paste?
Thermal paste is used purposely for insulation mostly in electronics. The paste seals the gap between the heatsink and the surface of the component on which the sink is. This is to help maximize the conduction between the component and the heatsink.
Without the paste, the heat-generating component will not get cooled properly by the heatsink and that can lead to overheating.
The materials used in making thermal paste allow it to have very conductive properties. This means any other paste can not be used in place of a thermal paste. In some cases, this paste can also serve as a filler.
Arctic MX-4 is one of the trusted brands of thermal pastes. You can get that for as low as $4.00 on AliExpress.
How To Apply Thermal Paste To GPU
To apply thermal paste to GPU, a little technical knowledge is required. You do not need to be highly technical to do that tho. If you know which of the components in your PC is the GPU, then you are good to go.
In this tutorial, We will be using an AMD Radeon graphic card. The process is the same for every graphic card. however, your graphic card might look different from what we have in this tutorial.
1. Remove the GPU
The process starts with you removing the GPU from the computer. Of course, you have to turn off your PC and disconnect every cable from it to start the whole process.
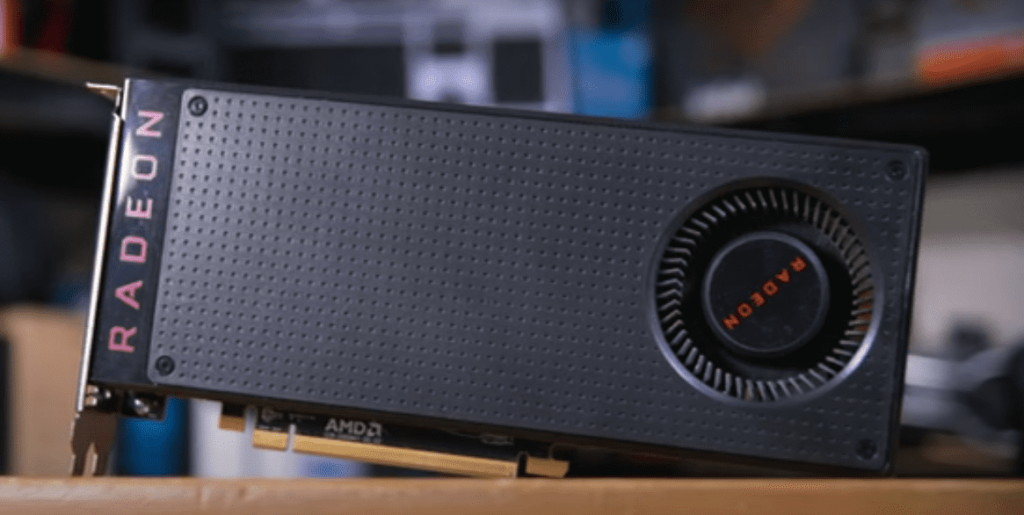
If you still can not identify where the GPU is, check where the PCI ports are. Graphic cards usually come with at least a fan on them and a 4 or 6 pins power cable connected to them. If you find it, carefully disconnect the cables connecting to it and remove it from the PC. You should have something similar to the one in the image below.
2. Disassemble
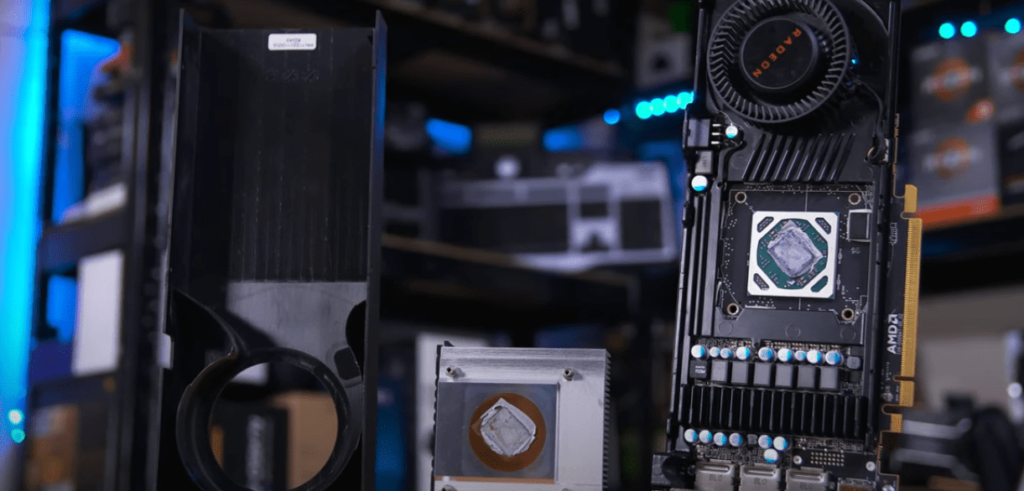
Now that you have your GPU removed, it is time to get highly technical. Get a screwdriver and unscrew all the screws on your graphics card. Most graphic cards have at least 15 screws around them. Make sure you disconnect the fan cable from the graphic card before you start the entire process.
If you are done with the unscrewing, make sure you carefully take everything apart until you have the sink separated from the GPU board.
3. Scrape and clean GPU
This is where you have to be even more careful. There are two ways this is done. You can scrape or clean with a cleaning agent.
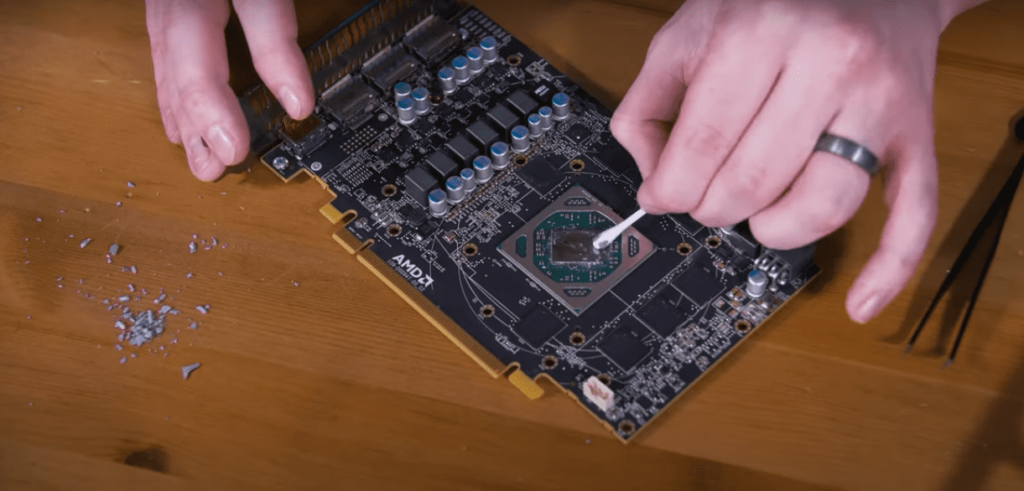
If the paste on the heatsink and the GPU chip looks dry, then the scraping method can be used. Simply get a plastic scraper and carefully scrape off all the dry paste. You must apply little pressure when scraping so you don’t scrape off any vital components.
If the paste on the sink and GPU is not dry, then go straight to using a thermal paste cleaning agent. This is an agent you can spread on a wipe or tissue and use to wipe the paste off. It works pretty well.
4. Apply thermal paste to GPU
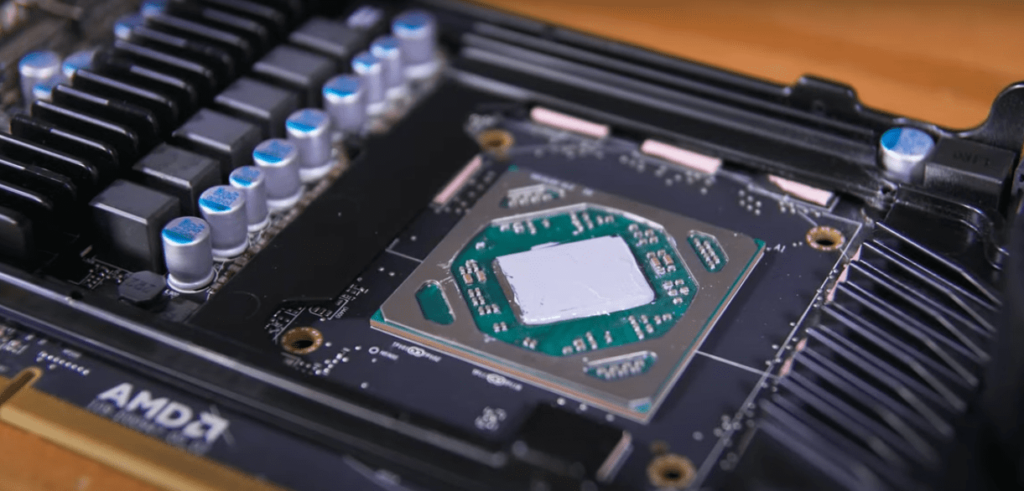
If you are done cleaning the GPU, then it is time to apply the thermal paste. Squeeze a good amount of the paste onto the middle of the surface of your GPU chip. Do not squeeze too much that it becomes difficult for even the heatsink to sit back on.
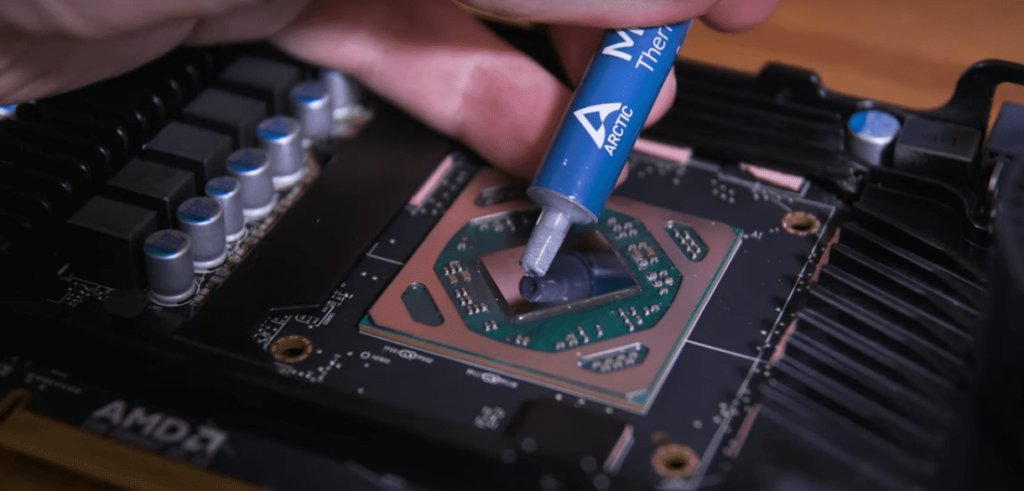
Spread the paste evenly onto the surface of the chip using a flat surface object. I always use the material I used for the scraping for this too. Do not let the paste spread exceed the surface of the chip.
5. Assemble your GPU
Reverse the process of disassembling to reassemble the graphics card. Make sure you put every screw where it is supposed to be. You should also make sure you connect the GPU fan exactly where you removed it.
Take your time after the reassembling to examine the whole graphics care to make sure you have screwed everywhere that needs screwing. When done, fix it back into your PC and run your test.
How to apply thermal paste to GPU – FAQs
These are question people frequently ask about the thermal paste. I will answer a few of them. If you have more questions, kindly leave them in the comment section and I will reply as early as possible.
The purpose of a thermal past is to allow efficient transfer of heat from the component on which it is used to the heatsink. The materials used in making the thermal paste play also make this possible.
You might not know this but the thermal paste plays a very vital role in how computers work. If there is no thermal paste, the conductivity between the processor and heatsink will be very low which will lead to overheating. That also means the PC will shut down whenever it is overheating.
