If you are a Headteacher, a school Validator, or SPV Return Officer and want to learn how to validate a staff picture, then this article may be useful for you. In this guide, I will show you step-by-step instructions on how picture validation is done on the Electronic Salary Payment Voucher (E-SPV) system.
You probably are wondering why Picture validation is so important. Well, without your passport picture being validated, you (as a teacher) can not generate a Mandatory Form from the Electronic Payslip platform. If you are currently finding it difficult to generate a Mandatory Form to access a load facility, then this may be one of the reasons.
The Controller & Accountant General’s Departments (CAGD) requires every teacher to get his/her Biodata validated on the E-SPV Return System, and this could only be done by creating an account on the CAGD E-Payslip system. If you haven’t yet already, you can follow these steps to learn more about how to create a Payslip account.
Now that you have gotten an idea of how relevant picture validation is, kindly follow the details provided below on how the picture validation process is done on the Electronic Salary Payment Voucher system. If you find it a bit complicated, let us know in the comment section or contact us for assistance.
E-SPV Picture Validation Process
To get started, make sure you are a Headteacher, a school Validator, or SPV Return Officer. Below are the steps on how to validate a staff picture on the E-SPV platform:
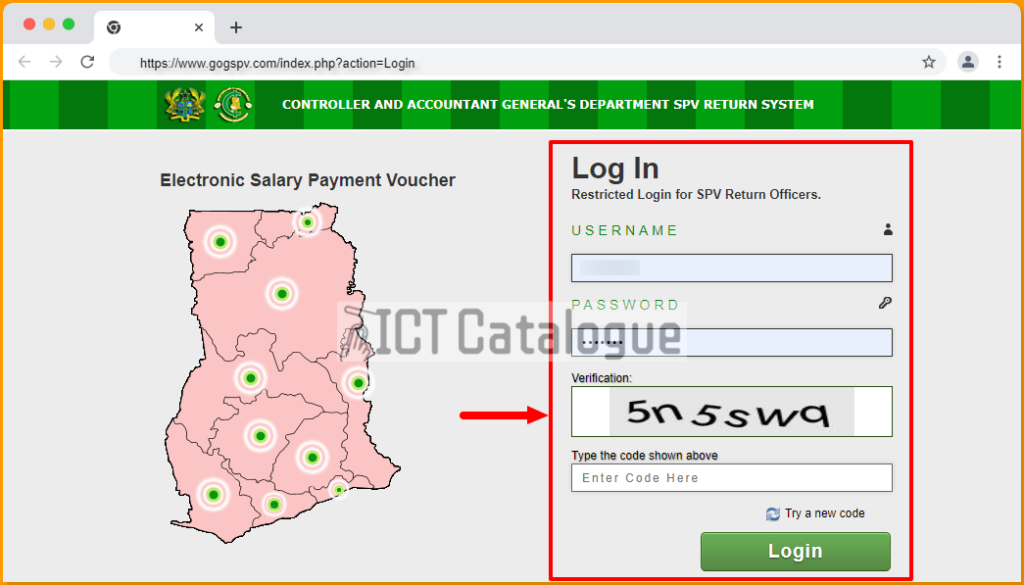
- Log in to your E-SPV account with your Username, Password and enter the verification code in their respective fields.
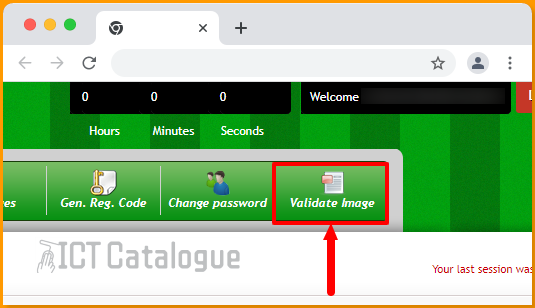
- Next, click on Validate Image located on the navigation menu.
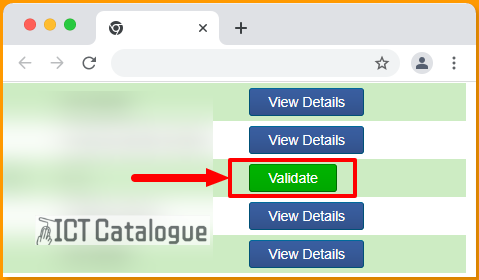
- On the Validate Employee Biodata page, look for a staff who isn’t validated from the STATUS column of the list (i.e. NOT VALIDATED) and click on the green “Validate” button next to it.
- Next, make sure the teacher has a passport picture located next to his/her details displayed before clicking on the “APPROVE” button, if not, use the “Upload Picture” button to start uploading a passport-size picture. You may click on the “Cancel” at the top-right corner to quit the process.
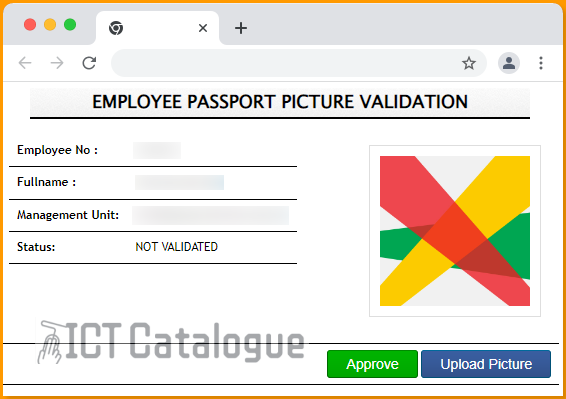
- Once you click on the “Approve” button, you will see a message indicating that the Picture validation was successful.
In conclusion, these are the Picture validation processes to go by. If you followed these step-by-step instructions carefully, you may have successfully approved an employee passport picture validation. You can learn more about how to validate Monthly Salary Payment vouchers in Ghana.