To curve text in Google Slides is very easy but it becomes difficult if you don’t know where to start. In this article, you will learn the easiest way to do that.
One of the features that can add a unique and creative touch to your presentation is the ability to curve text. Curving text can help make your presentation unique and very beautiful
Curved text can also help you emphasize certain elements in your presentation. For example, you might want to use curved text to highlight a key message, quote, or statistic. The curve can draw attention to the text and make it stand out more effectively than if it were simply written in a straight line.
Additionally, curved text can add a playful element to your design. Depending on the style and color scheme you choose, curved text can give your presentation a fun and whimsical feel. This can be particularly effective if you are presenting to a younger audience or if your topic lends itself to a more creative approach.
How to Curve Text in Google Slides
By walking you through the steps to curve text in Google Slides, this article aims to help you take advantage of this powerful tool and add some visual interest to your presentations. Whether you are a student, teacher, or professional, curving text can help you create more engaging and memorable presentations that will impress your audience.
However, curving text in Google Slides is impossible without a third-party app or software. There is no option to curve text in your slides so we will be using a third-party app for doing that.
The most common tool to use for this tutorial is Canva. One reason why I recommend Canva for this tutorial is that it is online and you don’t need to download any software to use it.
There are other tools that you can use for this particular tutorial including Microsoft PowerPoint. But I see Canva as the most convenient.
Let us look at the process below.
How to create curved text in Canva
- Visit canva.com and make sure you have created or signed into a previous account.
- Create your Canva image project. If you have no idea how to do that, you can check my previous article for how to use Canva.
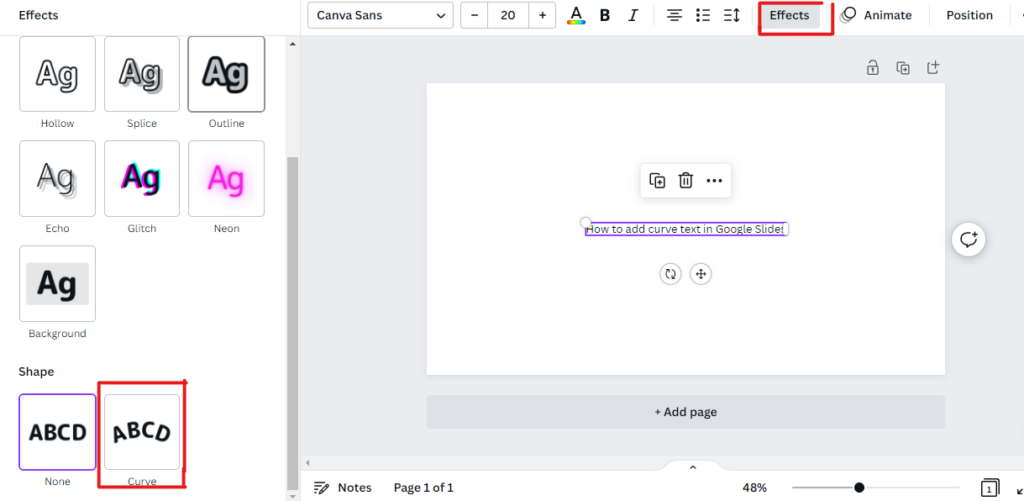
- In the empty project, add a text box and type the text you would like to use as the curved text in your Slides. Select the text, click on “Effect” and select “Curve” from the left pane.

- Resize the text to your desired size. Format and edit the text to your heart’s content before you go through the next step since you can’t make further changes.
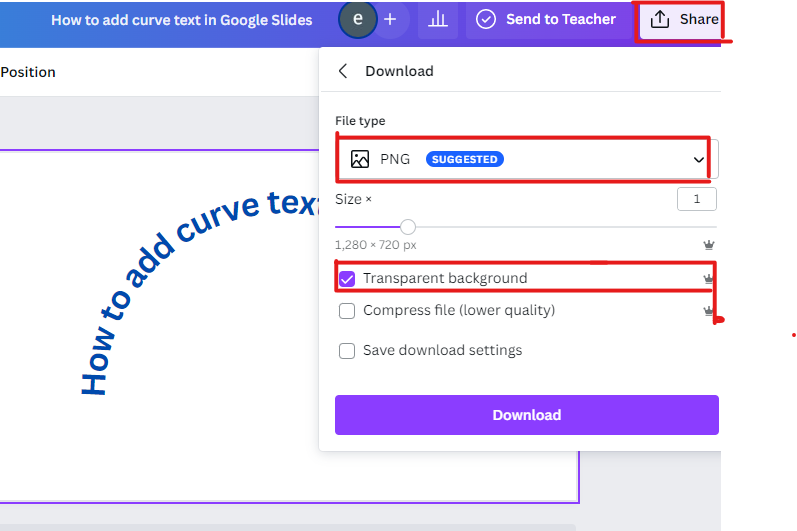
- After editing everything export the text as PNG. This will give your text a transparent background for reuse in your Google Slides.

Import curved text into Google Slides
- Visit docs.google.com/presentation and create your new presentation.
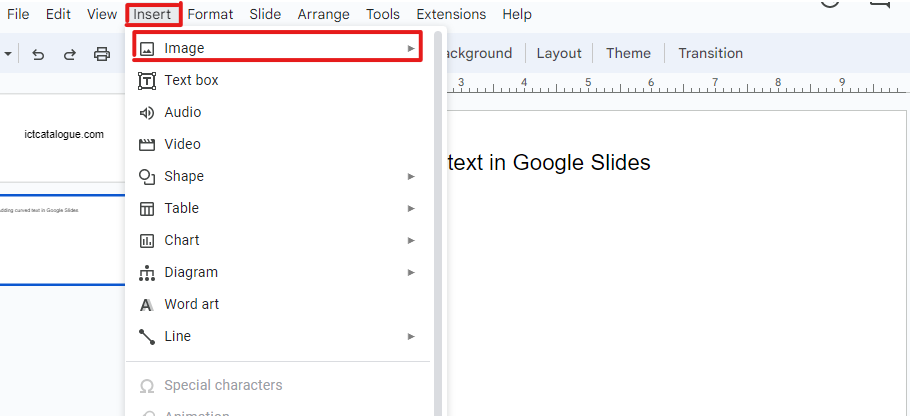
- Select the slide on which you want to put your curved text and click on “Insert” and go to “Image ” from the dropdown menu. Select “Upload from this computer” and locate the image you want to upload.

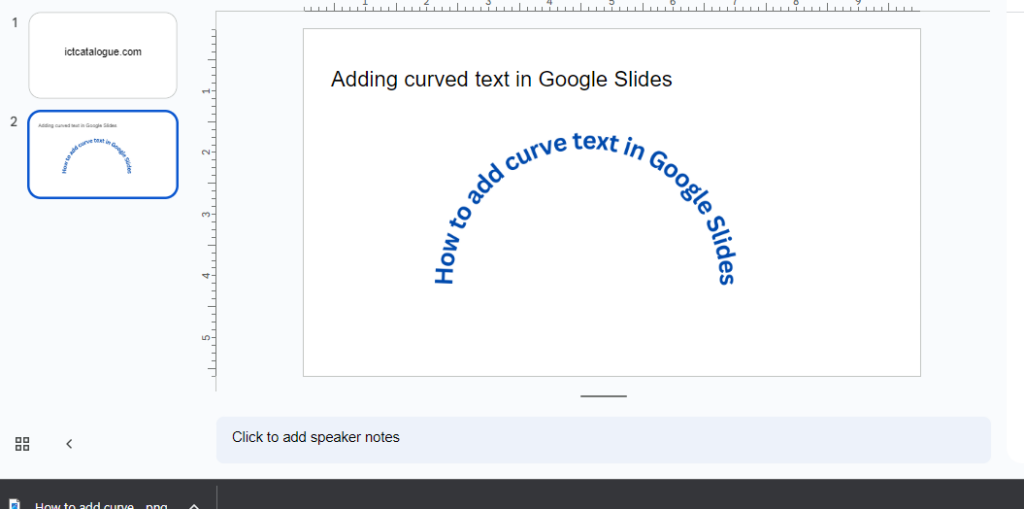
- Your curved text should insect perfectly into your Google Slides. Right after that, you could adjust the size of the text to fit exactly where you want it to fit. You should also note that you can adjust the size but you can not change the characters used in the text from Google Slides.

There are many ways you can curve text in Google Slides. But I decided to go with Canva because it is the easiest way out. Apart from being the easiest, you do not have to install any software.
If you already have Microsoft PowerPoint installed, you can easily use it to create curved text. Export it as a slide presentation and upload it to Google Slides for editing.
