Screen recording is very vital when it comes to presentations. Learn how to record your computer screen with Microsoft PowerPoint.
Screen recording has become an essential feature for many individuals, whether it be for educational, instructional, or entertainment purposes. Recording your screen allows you to have a video presentation of what exactly you want to teach.
Microsoft PowerPoint offers a convenient and straightforward way to record your computer screen. With this, you don’t need any additional software. In this article, I will guide you on how to record your computer screen with Microsoft PowerPoint but before that, let us look at what Microsoft PowerPoint is.
What is Microsoft PowerPoint?
Microsoft PowerPoint is a presentation software developed by Microsoft. It is used to create slideshows consisting of text, images, videos, and other multimedia elements.
The software allows users to create engaging and informative presentations for a variety of purposes, such as business meetings, educational lectures, or public speaking events. PowerPoint offers a wide range of features to customize and enhance presentations, such as themes, templates, animations, and multimedia effects. It is part of the Microsoft Office suite of productivity software and is available for both Windows and Mac operating systems.
How to Record Your Computer Screen with Microsoft PowerPoint
To record your computer screen you must have the Microsoft Office Suite installed. You can also install the latest Office 365 to get the PowerPoint software.
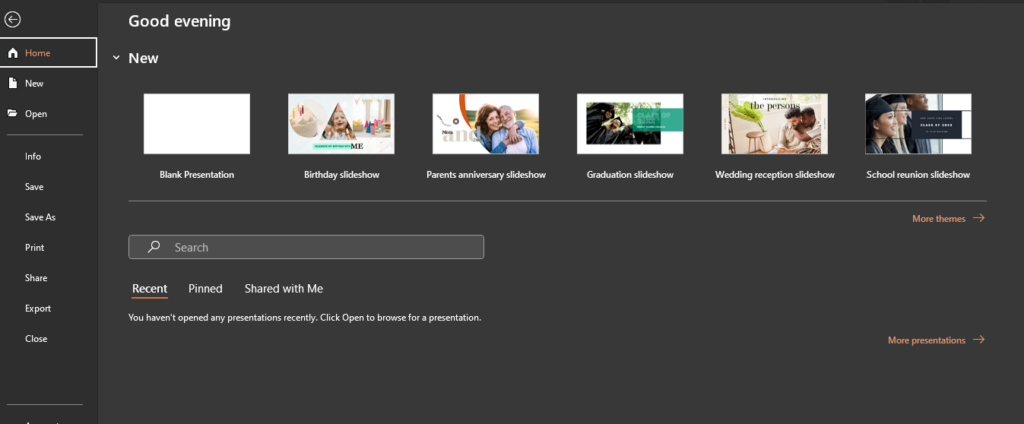
- To record your screen, open your PowerPoint application. Refer to the screenshot below.

- You can start by clicking on a blank presentation or simply selecting any of the presentation templates, to begin with.
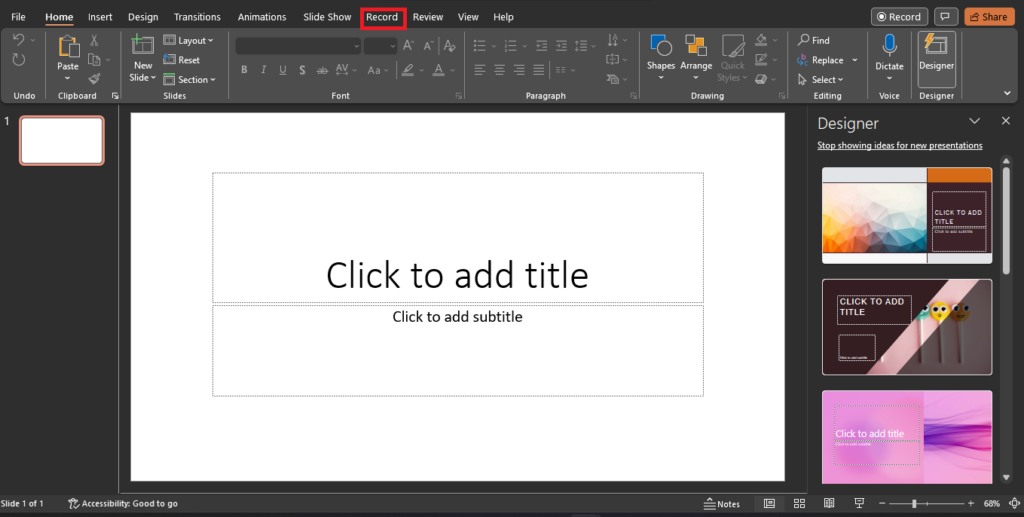
- After opening the presentation, click on the “Record” menu tab.

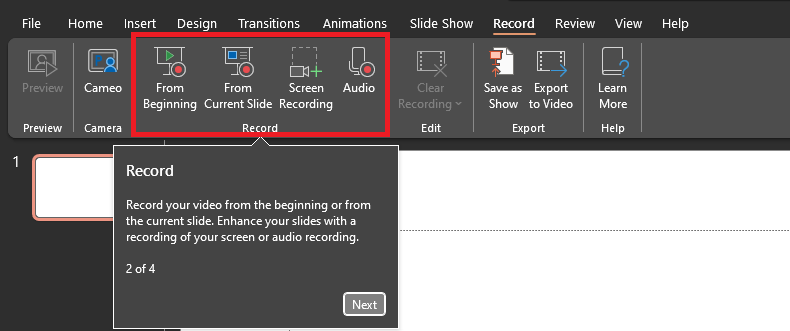
- On the “Record” ribbon, you have different types of recording options to choose from.
- From Beginning: This option will start recording from the very first slide no matter where you are in the slides. It will only record the PowerPoint slides.
- From Current Slide: This option will start your screen recording from the active slide. It also does not record your entire screen, just the PowerPoint slides.
- Screen Recording: This option will record your entire screen. Even if you open a different application, it will still record it.
- Audio: This will record an audio sound using your current sound input device.

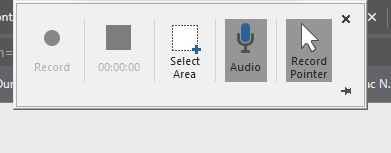
- If you click on the “Screen Recording” option which is the one we can use to record the entire screen, you will be given the option to select how you want your recording. You will also have to select the area of the screen you want to record.

- If you have selected the area of the screen to record, you can click the “Record” button to start recording. Alternatively, you can also press Windows Logo + Shift + R keys to start the recording.
The recorded video will be added to your current slide and you will have a lot of formatting tools to format the video.
How to stop the recording
Stopping the recording is very easy. You can move your pointer to the top of the screen and the control options will pop out. Click on the stop button to stop the recording.
Alternatively, you can also press the “Windows Logo + Shift + R” keys to stop the recording.
Immediately after you close the recording interface, the video will be added to your slide.
Conclusion
Adding screen recordings to your PowerPoint presentations is very necessary to make people understand exactly what you want them to know. The recording process in Microsoft PowerPoint is a very simple one and I believe you can use it effectively.
If you have any questions, you can leave a comment in the comments box and I will reply as early as possible.
